
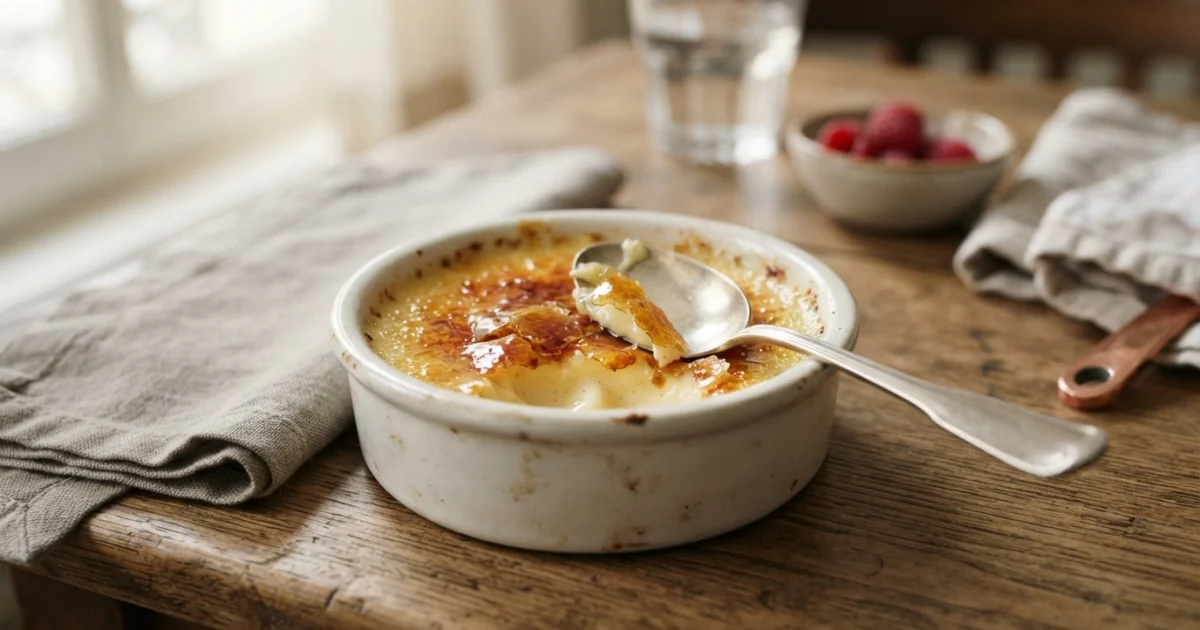
That definitive, satisfying crack of a silver spoon shattering an amber-tinted sugar shell is one of the great sensory rituals of French culinary craft. Beneath that brittle glass pane lies an unctuous, ice-cold custard, rich with egg yolks and scented with real vanilla. While often confused with its European cousins—the starch-thickened Spanish crema catalana, gelatin-stabilized Italian panna cotta, or dense stovetop pot de crème—a true French crème brûlée relies exclusively on gentle, indirect oven baking to coagulate rich dairy and eggs. Recreating bistro-grade crème brûlée at home does not require pastry-school pedigree; with five basic pantry ingredients and strict adherence to temperature control, you can produce a flawless dessert every single time. Much like baking an authentic French baguette, achieving perfection here relies on technique rather than complicated ingredients.
The Core Ingredients and Their Functional Science
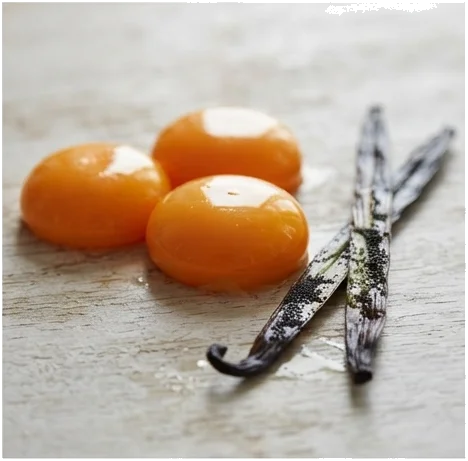
Because this recipe strips pastry technique down to its essentials, there is nowhere for subpar ingredients or loose measurements to hide. Understanding the physics behind each component guarantees success:
- Heavy Cream (Minimum 36% Milkfat): The high fat content is non-negotiable. Milkfat coats egg proteins, physically buffering them so they cannot bond too tightly and squeeze out moisture. Attempting to lighten the dish with whole milk or half-and-half introduces excess water, resulting in a loose, weeping custard that refuses to set into a silky emulsion.
- Egg Yolks: We discard the egg whites entirely. Egg white proteins (primarily ovalbumin) coagulate at relatively low temperatures into a firm, rubbery matrix. Yolks provide lecithin, a natural emulsifier, along with delicate fats that produce a tender, melt-in-the-mouth texture without a hint of sulfur.
- Granulated Sugar: Inside the custard base, sugar dissolves and binds with water molecules, raising the curdling threshold of the egg proteins so they set gradually rather than clumping. On the surface, dry sugar serves as the fuel for pure caramelization.
- Real Vanilla: A whole Bourbon vanilla bean, split and scraped directly into the warming dairy, delivers woodsy, floral aromatics and signature dark specks. Pure vanilla extract works as a secondary option, but avoid imitation vanilla at all costs; synthetic vanillin degrades under open torch flame into an acrid, chemical bitterness.
- Fine Sea Salt: Just a pinch is critical. Salt tempers the heavy dairy richness and sharpens the aromatic floral notes of the vanilla bean.
Essential Equipment: Ramekins, Water Baths, and Torches
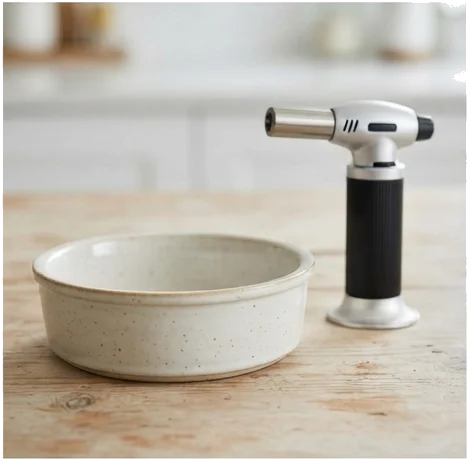
The architecture of your cookware directly dictates the final eating experience. Deep, narrow ramekins create an unbalanced ratio, leaving the diner with a small disc of caramel followed by a deep pool of warm pudding. Opt instead for shallow, wide ceramic ramekins (4 to 6 ounces). These maximize the surface area, ensuring that every spoonful carries both brittle caramel and cool custard.
To bake them, you will need a sturdy metal roasting pan. Before setting your ramekins inside, line the bottom of the pan with a clean, folded kitchen towel. This simple step provides vital friction to keep the slippery ceramic dishes stable, while insulating their bottoms from aggressive, direct heat conducted through the metal pan.
For the crust, a dedicated refillable butane kitchen torch is the undisputed gold standard. A torch generates an intense, pinpoint flame exceeding 2,500°F (1,370°C), liquifying and caramelizing sugar in under a minute without warming the chilled custard beneath. While an oven broiler can melt sugar in an emergency, it saturates the entire ramekin with ambient radiant heat, turning your chilled custard lukewarm and soup-like long before the sugar reaches an even amber.
Step-by-Step Method: Achieving an Ultra-Smooth Custard
Patience and visual checkpoints trump kitchen timers when coaxing delicate custard to set properly.
Infusing Cream and Whisking the Base
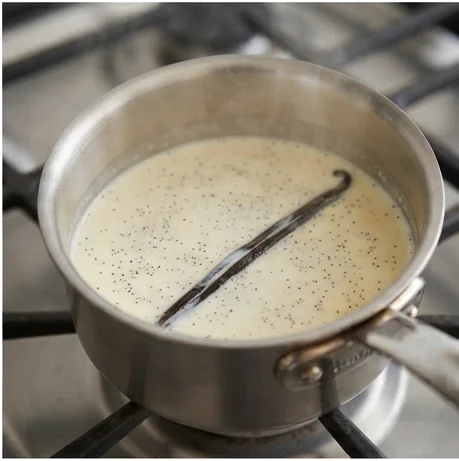
Pour your heavy cream into a heavy-bottomed saucepan. Split your vanilla bean lengthwise, scrape the sticky black caviar into the dairy with the back of a paring knife, and toss the empty pod into the pot. Warm over medium heat until the cream is gently steaming and tiny bubbles gather around the pan edges (around 175°F / 80°C). Do not boil. Remove the pan from heat, cover, and let steep for 10 minutes so the fats absorb the essential oils of the bean.
In a separate mixing bowl, whisk egg yolks, granulated sugar, and fine salt together for 1 to 2 minutes. Whisk only until the mixture turns pale, smooth, and falls from the whisk in ribbons. Avoid aggressive whipping; whipping beats ambient air into the yolks, creating stubborn microfoam that ruins a glossy custard surface.
Tempering and Straining for Silky Consistency
Tempering is the barrier between a velvet custard and sweetened scrambled eggs. Discard the vanilla pod from the warm cream. While whisking the egg yolk mixture continuously with one hand, slowly pour the warm cream in a pencil-thin stream with the other. This gradual introduction warms the egg proteins incrementally without shocking them into curdling.
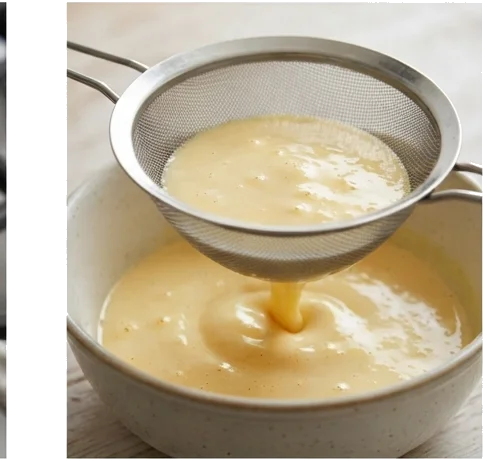
Once fully incorporated, pour the mixture through a fine-mesh sieve directly into a clean glass measuring pitcher with an easy-pour spout. The sieve strains out the chalazae (the white protein anchors on the yolks) and any accidental flecks of cooked egg. Before pouring into your ramekins, inspect the surface: if a pale froth has settled on top, gently skim it off with a shallow spoon or briefly waft your torch flame across the surface to pop the bubbles.
Baking in a Bain-Marie: Doneness Cues and Wobble Physics
Arrange your ramekins on the towel-lined roasting pan, leaving at least an inch of space between them. Pour the strained custard evenly among the dishes. Slide the roasting pan halfway onto your preheated 325°F (160°C) oven rack. Using a kettle, carefully pour hot water into the roasting pan—not into the ramekins—until the water bath reaches halfway up the sides of the ramekins. Sliding the pan in before filling minimizes splashing and burn hazards.
Bake for 30 to 45 minutes, monitoring the dishes closely after the 30-minute mark. To test doneness, gently nudge the roasting pan. The edges of the custard should appear set and matte, while the center should exhibit a soft, gelatin-like tremble. It must not slosh or ripple like liquid cream, nor should it dome, puff, brown, or crack (signs of catastrophic overcooking). If checking with an instant-read digital thermometer, the center should register precisely 170°F to 175°F (77°C to 80°C).
Chilling and Moisture Management
Immediately transfer the ramekins from the hot water bath onto a wire cooling rack using wide tongs or a spatula. Leaving them in the warm bain-marie will cause residual heat to overbake the eggs. Allow them to rest at room temperature for 30 minutes, then transfer them to the refrigerator uncovered for 1 hour to vent steam.
Once cooled, drape plastic wrap loosely over the dishes and chill for at least 4 hours, though overnight is ideal. A deep, cold core is mandatory; it prevents the heat of the caramelization torch from penetrating and breaking the custard's emulsion.
Crucial Technical Tip: Cold custards sweat when exposed to warm kitchen air. Before adding a grain of sugar, take a dry paper towel and gently blot the surface of each custard to lift away any condensation. Lingering surface water dissolves the sugar granules into a watery syrup before they can reach caramelization temperature, yielding an uneven, charred mess rather than a uniform crust.
Mastering the Sugar Crust: The Art of Brûlée
The sugar you choose dictates the crystalline structure of the crust:
- Superfine (Caster) Sugar: The absolute best choice. The diminutive granules melt rapidly and evenly under the flame, reducing torch contact time.
- Regular Granulated Sugar: Readily available and reliable, requiring only a few extra seconds of heat sweep.
- Powdered Sugar: Strictly avoid. Powdered sugar contains added cornstarch or anti-caking agents that char instantly into a bitter, acrid film.
Scatter roughly 1 to 1.5 teaspoons of sugar over each blotted custard. Gently tilt and tap the ramekin in a circular motion to spread an even, sheer layer of crystals from edge to edge, then invert the dish over a bowl to tap off any excess. A thin, uniform coating is essential; thick mounds of sugar will burn on the surface while remaining gritty underneath.
Ignite your butane torch to a steady, medium-intensity blue flame. Hold the tip of the flame roughly 2 to 3 inches away from the sugar. Move the flame in steady, continuous concentric circles, sweeping over the dish without pausing on a single spot. The sugar will quickly turn clear and bubble, progressing from pale champagne to a deep, gleaming golden amber.
Set the ramekins aside undisturbed for 60 to 120 seconds. During this brief rest, the liquid caramel cools, hardens, and contracts into a taut, glasslike sheet that rings crisply when tapped.
The Emergency Broiler Method: If you lack a kitchen torch, arrange your cold ramekins inside a metal baking dish packed with ice cubes. Move an oven rack to the very top position and preheat the broiler to high. Slide the iced custards directly beneath the element, leaving the oven door cracked slightly so you can watch. Broil for 2 to 3 minutes, rotating constantly. Pull them the moment the sugar bubbles amber. Be forewarned: the broiler will warm the top layer of custard, compromising the cold-hot contrast that defines the dessert.
Troubleshooting Common Custard and Crust Mistakes
| Defect | Root Cause | Corrective Action |
|---|---|---|
| Grainy or Curdled Texture | The dairy was added too quickly during tempering, or internal baking temperature exceeded 175°F (80°C). | Drizzle hot cream in a slow thread while whisking. Always use a water bath and pull the ramekins when the center still jiggles. |
| Loose, Soupy Center | Custard was pulled prematurely or low-fat dairy (milk/half-and-half) was substituted. | Verify dairy has ≥36% milkfat. Ensure water bath water is simmering hot when poured, and bake until edges are completely set. |
| Soft, Syrupy Sugar Crust | Surface moisture was present before torching, or the torched dessert sat in the refrigerator. | Blot custard tops dry with paper towels. Torch strictly 15 to 30 minutes before serving; never refrigerate post-torching. |
| Bitter, Black Scorched Spots | The torch flame lingered in one spot, or sugar was unevenly piled across the surface. | Maintain continuous circular sweeping motions 2–3 inches above the sugar. Dump excess sugar before lighting the torch. |
Make-Ahead Logistics and Storage Guidelines
Crème brûlée is inherently host-friendly if you divide the process strategically. You can bake, cool, and refrigerate the custards tightly sealed in plastic wrap for up to 3 days without any loss of textural integrity. If you are looking for another timeless sweet recipe, making European thin pancakes is an equally delightful way to impress guests.
Freezing baked custards is strictly discouraged. Sub-zero temperatures damage the delicate lipid-and-protein emulsion; upon thawing, the matrix collapses and sheds liquid (syneresis), leaving you with a spongy, separated mess.
Once you caramelize the sugar, the clock starts ticking. Sugar is naturally hygroscopic, meaning it greedily pulls moisture from both the cold custard beneath it and the ambient air. Within an hour, that shatter-crisp glass shell dissolves into an unappealing syrup. Torch your crèmes brûlées no more than 15 to 30 minutes before serving, letting your guests watch the crack of the spoon unfold at the table.
Frequently Asked Questions
Can I make crème brûlée without a kitchen torch?
Yes, using your oven's broiler on its highest setting. Place your chilled, sugar-coated ramekins inside a roasting pan packed with ice cubes to shield the bottom custard from ambient heat, then slide them directly under the glowing broiler element for 2 to 3 minutes. Keep the door slightly ajar to monitor progress and rotate the pan frequently. Note that while functional, a broiler will inevitably warm the custard beneath, softening the cold-hot temperature contrast achieved with a direct butane flame.
Why is my crème brûlée custard grainy or curdled?
Graininess occurs when delicate egg yolk proteins are shocked by uncontrolled heat. This happens if hot cream is poured too rapidly into the yolks without steady whisking, or if the custards are baked past their safety ceiling of 175°F (80°C). When egg proteins overheat, they knot together tightly, squeezing out water and forming microscopic clumps of cooked egg. Always temper gradually, strain through a fine-mesh sieve, and bake inside a buffered water bath.
How far in advance can I prepare crème brûlée for a party?
You can bake the custard bases, let them cool, and store them tightly covered with plastic wrap in the refrigerator for up to 3 days ahead of your event. However, do not apply and torch the sugar topping in advance. The caramelized crust must be fired 15 to 30 minutes before presentation, as sugar pulls moisture from the dairy and air, turning soft and sticky within an hour or two.
What is the best sugar to use for the caramelized top?
Superfine (caster) sugar is the preferred choice of French pastry chefs because its tiny crystals melt rapidly and evenly under the torch flame, minimizing heat transfer to the custard. Regular granulated white sugar is an excellent second choice. Never use confectioners' (powdered) sugar, as the cornstarch added to prevent caking scorches into a bitter, blackened residue under an open flame.
Why is a water bath (bain-marie) necessary for baking crème brûlée?
Water cannot exceed 212°F (100°C) at normal atmospheric pressure. By surrounding your ramekins halfway with hot water, you create a temperature buffer that shields the fragile egg proteins from the harsh dry radiant heat of the oven walls. This thermal buffer ensures gentle, uniform cooking from the perimeter to the core, preventing curdled edges, premature browning, and surface cracking.
Leave a Comment