
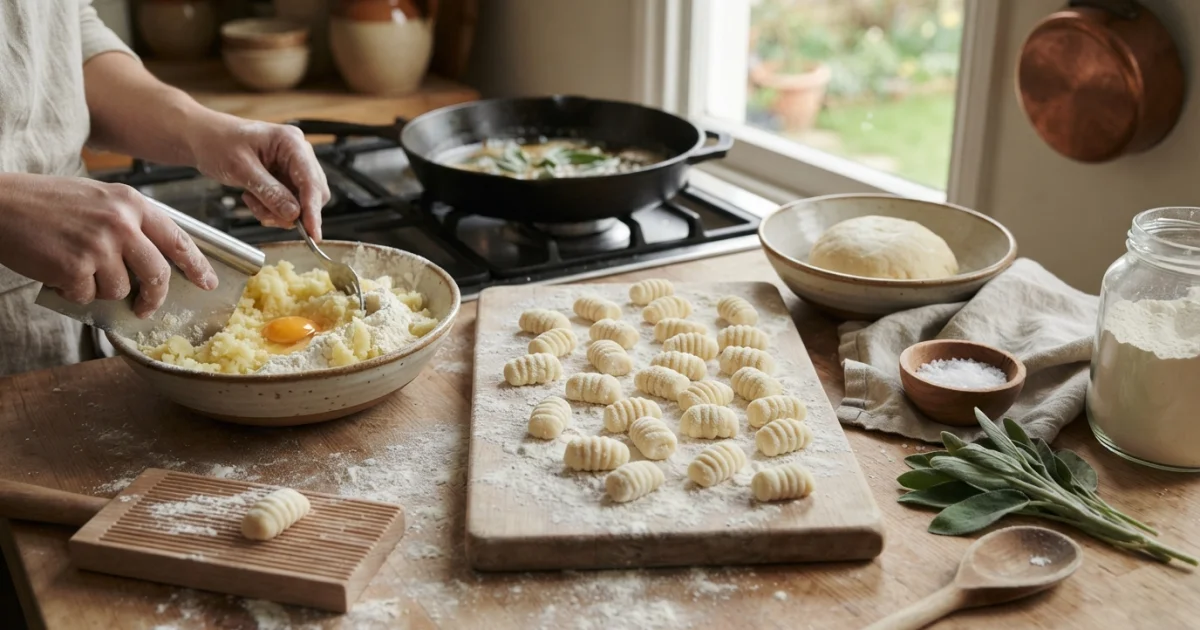
Anyone who has only encountered gnocchi from vacuum-sealed supermarket packets knows them as leaden, rubbery pellets that sit like ballast in the stomach. But order them at an unassuming trattoria in Piedmont or the Veneto, and you receive something transcendent: tender, cloud-like pillows that yield delicately on the tongue under the mere weight of browned butter. Authentic Italian potato gnocchi are fundamentally simple dumplings made of potato and flour, yet their magic rests on an unforgiving culinary axiom: moisture is the sworn enemy of lightness. Just as trattorias across the Veneto take pride in these cloud-like dumplings, they often conclude the meal with authentic Italian tiramisu.
The Core Science: Managing Moisture and Starch
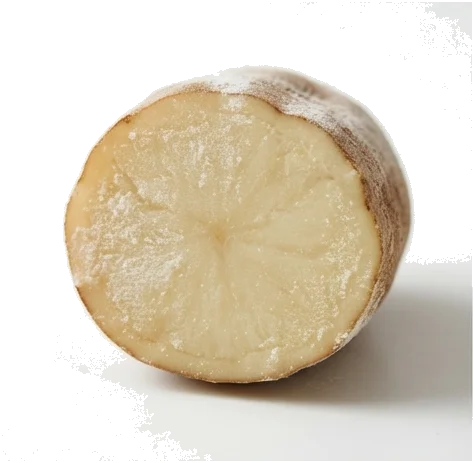
Understanding gnocchi requires looking at the humble potato through the lens of starch chemistry. When potatoes hold excess water, that moisture must be absorbed by flour to form a cohesive dough. The more flour you introduce, the more you hydrate the proteins gliadin and glutenin. Once worked, these proteins form a dense gluten matrix, turning what should be a tender, pillowy dumpling into an unyielding, chewy lump of dough. To keep gnocchi delicate, you must select high-starch, low-moisture potatoes and cook them using methods that expel water rather than invite it in.
Potato Selection: Why Russets Reign Supreme
For pristine gnocchi, Russet (or Idaho) potatoes are mandatory. Russets possess high levels of starch (primarily amylose and amylopectin) and low moisture content. Older potatoes pulled from the back of the pantry are ideal, as weeks of storage naturally evaporate internal water. Avoid waxy potatoes at all costs, including red-skinned varieties and standard young Yukon Golds. Waxy potatoes are loaded with moisture and low on starch; mashing them yields a wet, gummy paste that demands excessive flour to bind, guaranteeing dense results.
Cooking Method: Baking vs. Boiling Whole
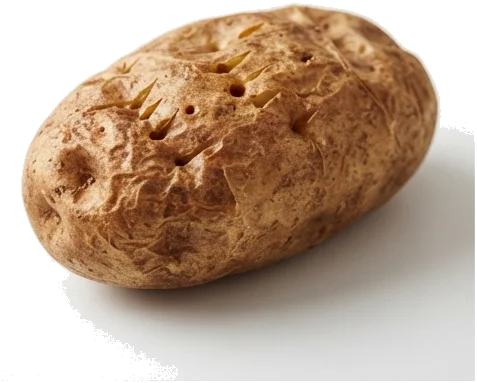
How you cook the potatoes determines how much flour your dough will demand. There are two reliable routes:
- Method A: Dry Oven Baking (Preferred). Pierce unpeeled Russets several times with a fork and place them directly onto the wire rack of an oven preheated to 400°F (205°C). Bake for 50 to 70 minutes until a paring knife pierces the center with zero resistance. Baking forces moisture to evaporate through the skin, leaving an exceptionally dry, floury crumb.
- Method B: Boiling Whole in Jackets. Place whole, unpeeled potatoes in a pot of cold, unsalted water. Bring to a gentle boil and cook for 45 to 55 minutes. The skin must remain completely intact; a single split allows boiling water to rush into the starch cells, instantly waterlogging the flesh. Drain immediately the moment they are tender.
Essential Tools: Why a Potato Ricer Is Non-Negotiable
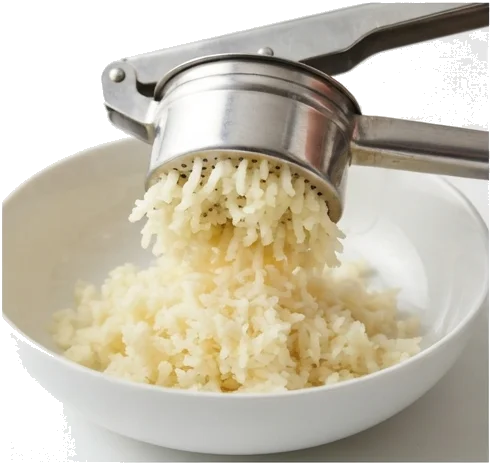
If there is one non-negotiable tool on the counter, it is a classic potato ricer or food mill. Food processors, immersion blenders, and handheld electric mixers must never touch cooked potatoes destined for gnocchi. High-speed spinning blades mechanically shear the swollen starch granules, unleashing gelatinized amylose directly into the mix and transforming your potatoes into sticky, gluey wallpaper paste.
A ricer, by contrast, gently pushes the hot potato flesh through thousands of tiny perforations, separating the cells cleanly without rupturing their cell walls. The result is a light, airy snowfall of potato. Alongside your ricer, keep a metal bench scraper for cutting and folding the dough, and either a grooved wooden gnocchi board (rigagnocchi) or a standard table fork to shape the ridges.
Step-by-Step From-Scratch Potato Gnocchi
This master ratio yields 4 generous servings of tender gnocchi:
- 2 lbs (900g) Russet potatoes
- 1 cup to 1.5 cups (120g to 190g) unbleached all-purpose flour or Italian Tipo '00' flour, plus extra for dusting
- 1 tsp (5g) fine kosher salt
- 1 large egg, lightly beaten (optional, but serves as reliable structural insurance for beginners)
1. Peeling, Ricing, and Steam Release
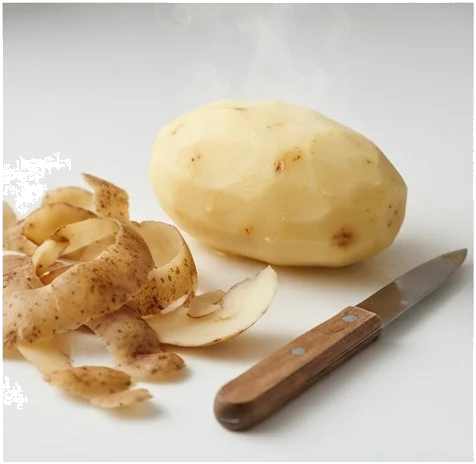
While the cooked potatoes are still piping hot, hold them with a clean kitchen towel and peel away the skins using a paring knife. Work quickly; hot potatoes rice smoothly, whereas cool potatoes become dense and gummy. Rice the peeled tubers immediately over a clean, unvarnished wooden board or marble counter, letting the potato fall in a wide, loose layer. Spread the riced potato gently with your hands and let it rest undisturbed for 5 to 10 minutes. Watch the steam billow off; every plume of vapor leaving the counter is water you will not have to compensate for with extra flour.
2. Bringing the Dough Together (The 60-Second Rule)
Scatter the kosher salt evenly over the cooled potato layer. Make a shallow well in the center, pour in the beaten egg (if using), and sift approximately half of the flour (about 3/4 cup / 90g) across the surface. Using your bench scraper, cut and fold the ingredients together in a gentle motion, bringing the edges toward the center. Gradually sift in the remaining flour, adding only as much as needed until the crumbs coalesce into a soft, slightly tacky mass that feels supple, much like an earlobe.
Adhere strictly to the 60-second rule: once the flour meets the potato, do not knead this like bread dough. Over-handling activates gluten strands. Fold and press the dough gently with the heels of your hands for roughly one minute—just until unified and smooth. If it clings slightly to your board, dust with a whisper of flour, but resist the temptation to dump flour onto the counter.
3. The Critical One-Piece Float Test
Before portioning and shaping the entire batch, bring a small saucepan of salted water to a gentle simmer. Pinch off a marble-sized nugget of dough and drop it into the water. If the piece holds its shape, rises cleanly to the surface, and tastes tender after a minute of simmering, your hydration balance is spot on. If it dissolves, frays along the edges, or breaks apart, gently fold 1 to 2 tablespoons of additional flour into the main dough mass and perform the test once more.
4. Shaping, Cutting, and Rolling Ridges
Dust your work surface lightly with flour. Using the bench scraper, slice the dough into 6 to 8 equal portions. Keep the pieces you are not working with loosely covered with a clean tea towel so they do not dry out.
- Gently roll each piece back and forth under your palms, moving from the center outward, until you form an even rope roughly 1/2 to 3/4 inch (1.5 to 2 cm) in diameter.
- Use your bench scraper to slice the rope into neat pillows, each about 3/4 to 1 inch (2 cm) long. Dust them lightly with flour so cut edges do not stick together.
- To roll ridges, hold a grooved gnocchi board or the back tines of a fork at a 45-degree angle. Place a dumpling at the top, and with a light roll of your thumb, flick the dough downward. The dumpling will curl slightly, leaving a thumb impression on the back and parallel ridges on the front. This classic texture is not purely decorative; those grooves act as channels that capture sauce, while the internal hollow ensures quick, uniform cooking.
5. Boiling and Pan-Finishing
Bring a large, wide pot filled with at least 4 quarts (3.8 liters) of generously salted water to a gentle rolling boil. Do not boil violently, as rough churning water can tear delicate dumplings apart. Drop the gnocchi in batches of 20 to 30 to prevent dropping the water temperature.
The dumplings will sink momentarily, then rise to the surface within 60 to 90 seconds. Once they float, allow them to cook for an additional 30 to 60 seconds (total cooking time: 90 seconds to 2 minutes). Lift them out immediately using a wire spider strainer or large slotted spoon, transferring them directly into your warm sauce or a buttered skillet. Never tip gnocchi into a sink colander; the weight of the batch falling on itself will crush their delicate structures.
Troubleshooting Common Gnocchi Pitfalls
| Problem | Root Cause | The Fix |
|---|---|---|
| Dense, Chewy, or Rubbery | Overworked dough (gluten development), using waxy potatoes, or adding too much flour because potatoes retained moisture. | Switch to dry Russets, let riced potatoes steam off completely, and handle dough for under 60 seconds. |
| Disintegrating in Boiling Water | Insufficient flour binder, waterlogged potatoes, skipping the egg in wet dough, or boiling the water too violently. | Always run a single-piece float test; fold in 1–2 tbsp flour if needed. Keep boiling water at a gentle simmer. |
| Gooey, Sticky Mash | Using a food processor or blender, which mechanically bursts starch cells, releasing gelatinized amylose. | Discard and restart; use exclusively a manual potato ricer or food mill while the tubers are hot. |
Freezing and Make-Ahead Instructions
Never refrigerate uncooked potato gnocchi dough. The raw potato oxidizes quickly, turning an unappetizing slate gray, while the salt draws out trapped water, leaving you with an unworkable, soupy slurry within a few hours.
The Flash-Freeze Method: To store gnocchi for later, arrange shaped, uncooked dumplings in a single layer on a parchment-lined, lightly floured baking sheet, making sure none touch. Place the sheet level in your freezer for roughly 2 hours until the dumplings are rock hard. Transfer the frozen gnocchi into an airtight zip-top bag or freezer container. They keep beautifully for up to 3 months.
Cooking from Frozen: Crucial rule: Never thaw frozen gnocchi. If thawed, the delicate cell walls collapse into mush. Drop the rock-hard dumplings directly into salted, simmering water. Simply add 1 to 2 extra minutes to your standard cook time, lifting them out 60 seconds after they rise to the top.
Classic Sauces and Serving Suggestions
Because tender gnocchi possess a delicate, buttery starch profile, they pair best with sauces that dress rather than drown them:
- Burro e Salvia (Brown Butter & Crispy Sage): Melt unsalted butter in a wide skillet over medium heat until the milk solids turn hazelnut-brown and fragrant. Fry fresh whole sage leaves until crisp. Toss the boiled gnocchi directly into the pan, garnish with toasted hazelnuts, and finish with freshly grated Parmigiano-Reggiano.
- Gnocchi alla Sorrentina: Toss cooked dumplings in a light, sweet San Marzano tomato-basil sugo, fold through fresh cubes of fior di latte or fresh mozzarella, sprinkle with grated Pecorino, and bake in a hot oven (425°F / 220°C) for 8 to 10 minutes until bubbly and browned.
- Classic Basil Pesto Genovese: Loosen freshly pounded basil, garlic, pine nut, and olive oil pesto with a splash of starchy gnocchi cooking water in a warm bowl, then gently fold the dumplings through off the heat to preserve the basil's vibrant green hue.
- Pan-Seared Finish: For an exceptional textural contrast, lift the cooked gnocchi from the water and transfer them into a foaming skillet of butter and olive oil over medium-high heat. Let them sit undisturbed for 2 to 3 minutes until the undersides develop a crisp, golden crust, while the interior remains creamy.
Frequently Asked Questions
Is an egg necessary for potato gnocchi?
No, an egg is not strictly mandatory. In northern Italy, many classic purists use only potatoes and flour. However, incorporating one egg provides valuable protein structure, making the dough substantially easier to handle, less prone to disintegrating in the water, and more forgiving if your potatoes hold a touch of excess moisture. For beginners, using an egg guarantees consistent success without sacrificing tenderness.
Why did my gnocchi dissolve in boiling water?
Dumplings dissolve primarily because there was not enough flour to bind the starches, or the potatoes absorbed too much moisture during cooking. Additionally, dropping gnocchi into water that is boiling at an aggressive, turbulent rolling boil can mechanically batter the dumplings apart. Maintain a gentle simmer and always test a single piece of dough before shaping the entire batch.
Can I use Yukon Gold potatoes instead of Russet?
While some recipes suggest Yukon Golds for their rich, buttery flavor, they are medium-starch potatoes containing noticeably more moisture than Russets. That extra water requires you to incorporate significantly more flour, which increases the likelihood of ending up with dense, heavy dumplings. If you must use Yukon Golds, dry-bake them thoroughly and ensure all steam escapes before assembling the dough.
Can I make gnocchi dough ahead of time and refrigerate it?
No. Uncooked potato gnocchi dough deteriorates rapidly in the refrigerator. The salt draws moisture from the raw potatoes, making the dough wet and sticky, while oxidation turns the dough an unattractive gray. Always shape your gnocchi immediately after mixing, and if you wish to prepare them in advance, flash-freeze them solid on a sheet pan before storing them in freezer bags.
Leave a Comment